How To Set This Page
About Pelican
Pelican is a utility that lets you create beautiful weblogs using just text files. Github Pages allows users to store page content in a git repository along with their code. By combining Pelican with Github Pages, you can have a reliable and attractive blog site for your projects.
Steps
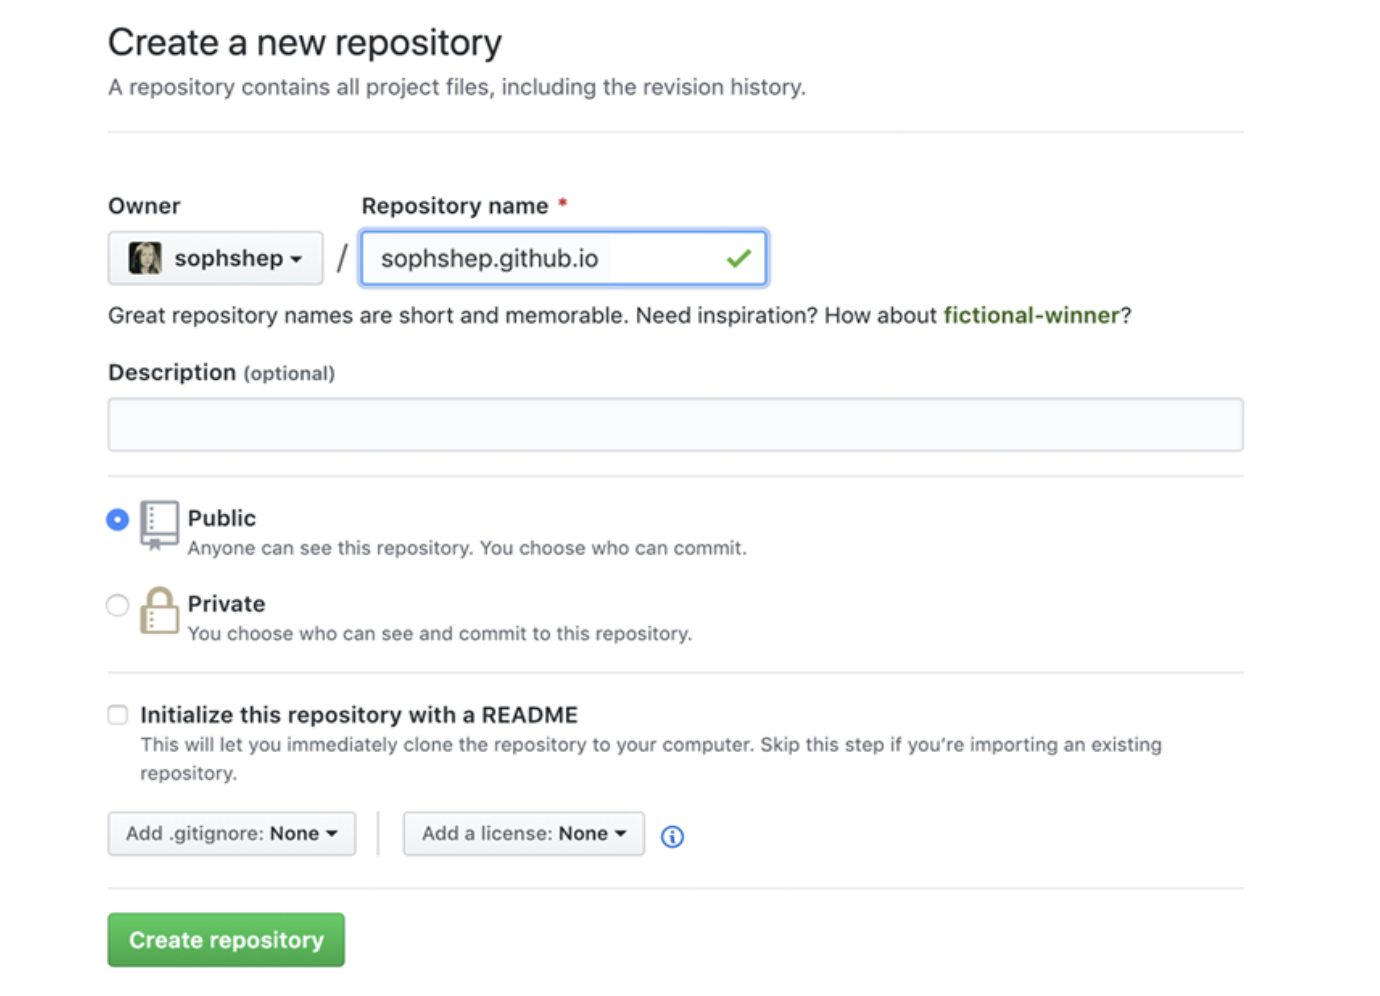
1. Create a repository on GitHub
Head over to GitHub and create a new repository named username.github.io, where username is your username (or organization name) on GitHub. Note that this repository should be public.
2. Clone the repository
Go to the folder where you want to store your project, and clone the new repository:
$ git clone https://github.com/username/username.github.io
$ cd username.github.io
3. Create new branch
When you enter https://username.github.io, what will happen? And how can GitHub detect your html file in repository? In fact, GitHub automatically detects index.html file from the main branch, and presents this file as your website entrance. Therefore, we need place our page files (the output/ folder in pelican) in main branch. I strongly prefer not to keep all the Pelican configuration files and raw Markdown files in main branch. So I keep the Pelican configuration and the raw content in a separate branch I like to call notebook_source.
$ git checkout -b notebook_source
Switched to a new branch 'notebook_source'
4. Configure Pelican
Now it's time for content configuration. Pelican provides a great initialization tool called pelican-quickstart that will ask you a series of questions about your blog.
$ pelican-quickstart
You can take the defaults on every question except:
- Website title (which should be unique and special)
- Website author (which can be a personal username or your full name)
- Time zone (Such as Asia/Shanghai)
- Upload to GitHub Pages, which is a "y" in our case
5. Add pelican files to the notebook_source branch
Add all the Pelican-generated files to the content branch of the local Git repo, commit the changes, and push the local changes to the remote repo hosted on GitHub by entering:
$ git add .
$ git commit -m 'initial pelican commit to content'
$ git push origin content
6. Write content
Now you can get bloggy! All of your blog posts, photos, images, PDFs, etc., will live in the content directory, which is initially empty. We can use Markdown syntax. To begin creating a first post, enter:
$ cd content
$ touch first-post.md
Next, open the empty file first-post.md in your favorite text editor and add the following:
Title: My super title
Date: 2010-12-03 10:20
Modified: 2010-12-05 19:30
Category: Python
Tags: pelican, publishing
Slug: my-super-post
Authors: Alexis Metaireau, Conan Doyle
Summary: Short version for index and feeds

This is the content of my super blog post.
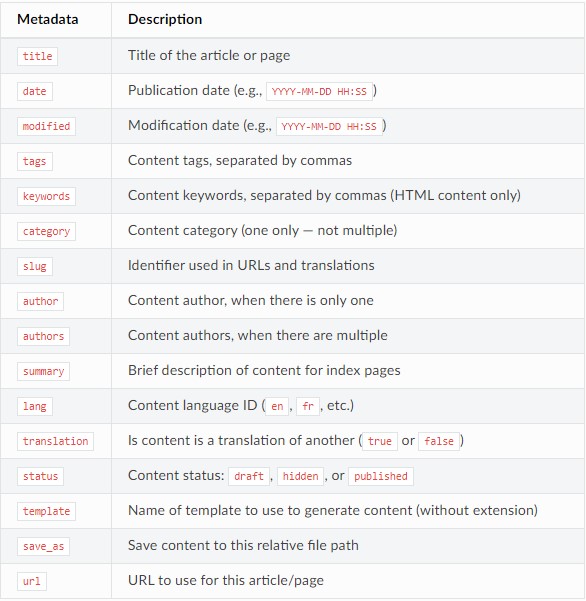
You can also have your own metadata keys (so long as they don’t conflict with reserved metadata keywords) for use in your templates. The following table contains a list of reserved metadata keywords:
7. Install ghp-import
$ pip install pelican ghp-import Markdown
8. Publish
All that's left to do is:
- Run Pelican to generate the static HTML files in output.
-ris to enable watching for your modifications, instead of manually re-running it every time you want to see your changes.
$ pelican content -s pelicanconf.py -r
- Use ghp-import to add the contents of the output directory to the main branch:
$ ghp-import -m "Generate Pelican site" --no-jekyll -b main output
- Push the local main branch to the remote repo:
$ git push origin main
- Commit and push the new content to the content branch:
$ git add content
$ git commit -m 'added a first post, a photo and an about page'
$ git push origin content
9. Finally!
Now the exciting part is here when you get to view what you've published for everyone to see! Open your browser and enter: https://username.github.io
[Note]: I use the theme buruma.
How to modify in the future
After modification, under the notebook_source category and notebook_source branch, enter:
pelican content
to generate output/ files.
enter:
git add -u
git commit -m "."
git push origin notebook_source:notebook_source
to commit notebook_source branch. (-u only add changes of tracked files)
enter:
ghp-import -m "Generate Pelican site" --no-jekyll -b main output -c audreyw.top
to put new output content to main branch.
lastly, enter:
git push origin main:main
to commit main branch.
Check the deployments of Page
Note, Github also has a deployment page. after push all modification, you can enter:
https://github.com/audreycs/audreycs.github.io/deployments
where lists the deployments and the time they were deployed.